|
Software to Control PTZ Cameras
|
|||||||||||||||||||||||||||||||||||||||||||||||||||||||||||
|
PTZ Controller
v3 User Manual
|
|||||||||||||||||||||||||||||||||||||||||||||||||||||||||||
|
|
|||||||||||||||||||||||||||||||||||||||||||||||||||||||||||
|
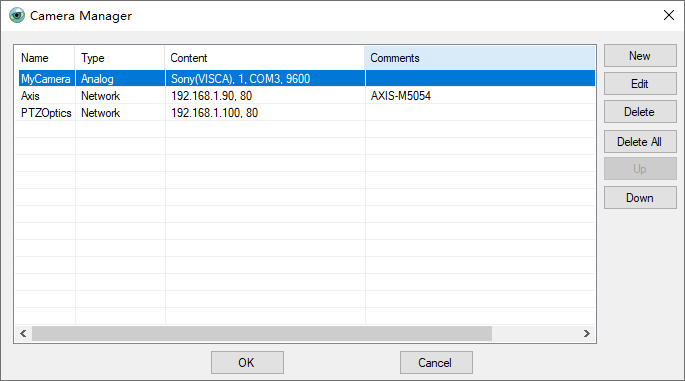
Click menu Setting --> Camera Manager to open Camera Manager panel.
It can
also be opened by clicking
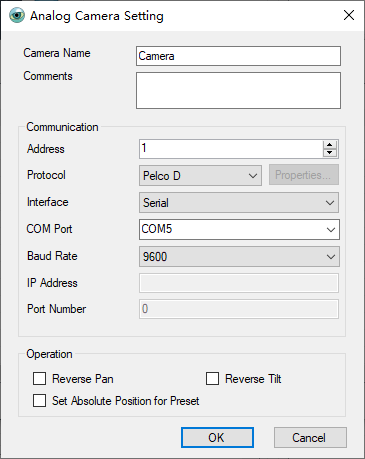
Click New button to show Camera Setting panel to edit or select the camera's name, address, protocol, connected Com Port and baud rate. Please refer the manual of your PTZ Camera to select the right value. The option Set Absolute Position for Preset works for Pelco D protocol ONLY. Be sure you have your camera or Pan &Tilt head connected when you check this option.
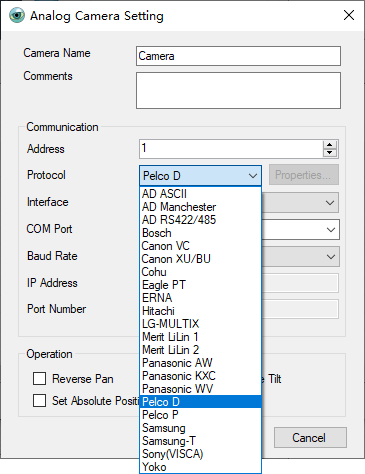
All supported protocols are list here.
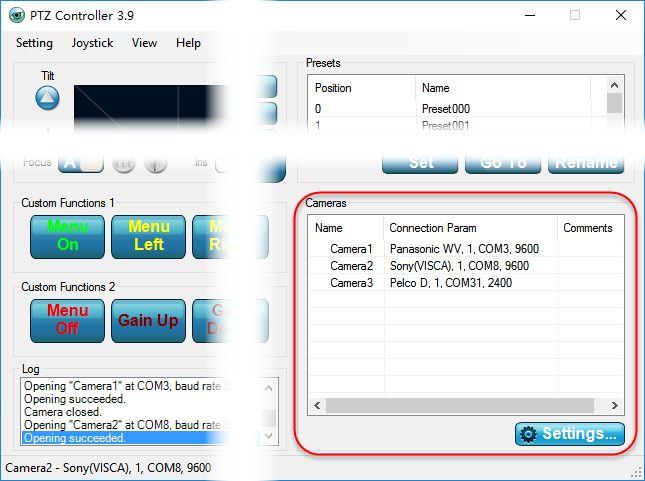
All added cameras will be list in Camera Panel on normal main interface.
5 ways to control Pan:
5 ways to control Tilt:
4 ways to control Zoom:
3 ways to control Focus:
3 ways to control Iris:
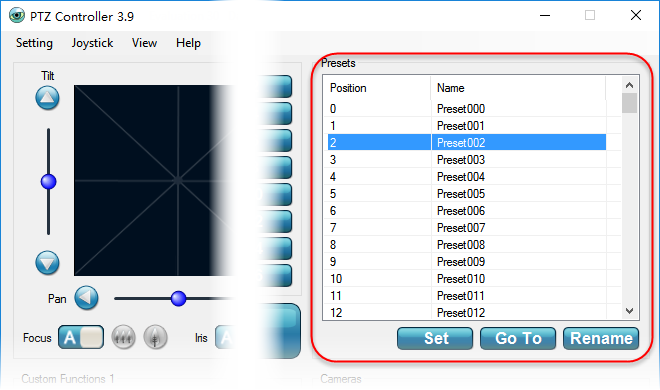
There are 127 preset position in Presets Panel. To set
preset, after your move/control PTZ camera to a position, select a preset item in Presets
Panel. Click
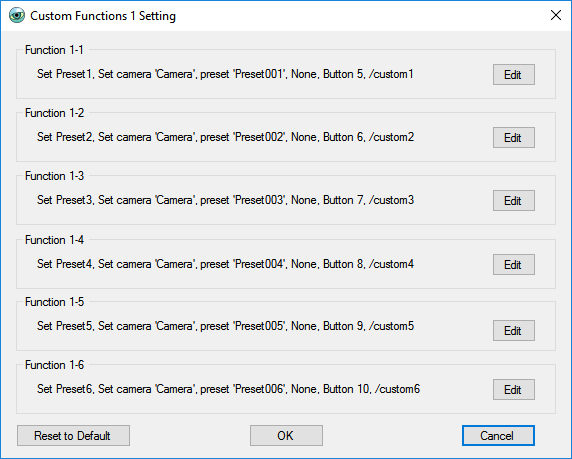
You can also use default Custom Functions button to set preset directly. There are 6 buttons in Custom Functions 1 panel. These 6 buttons are shortcut buttons for some custom functions. You can keep them for Set Preset function.
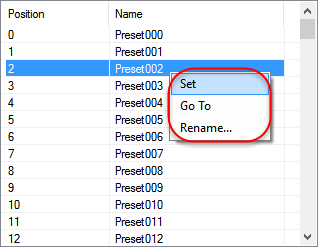
Right-click the prest item to show context menu. Click Set option to Set the preset directly.
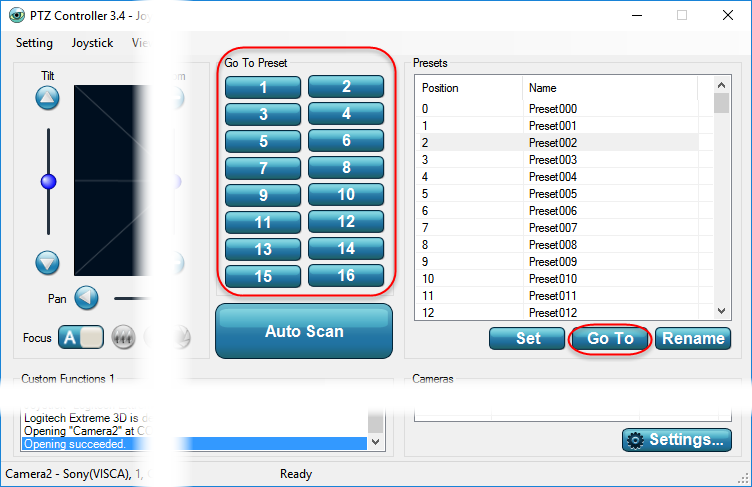
After you have set preset, you can select the preset item in
Presets Panel,
click There are 16 Go To Preset buttons already be list on main interface. You can also just click the Go To preset button directly.
Right-click the prest item to show context menu. Click Go To option to Go To the preset directly.
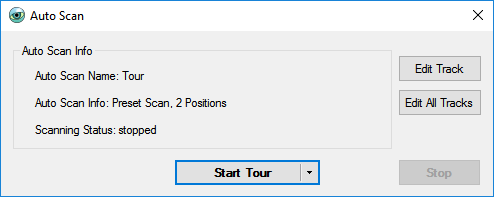
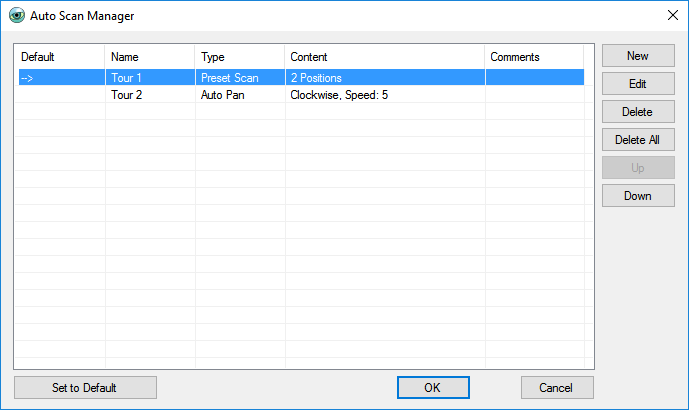
PTZ Controller 3.7 supports multiple auto scan tracks. Click menu Setting -> Auto Scan Manager -> New to add auto scan track to Auto Scan Manager panel.
Or, click
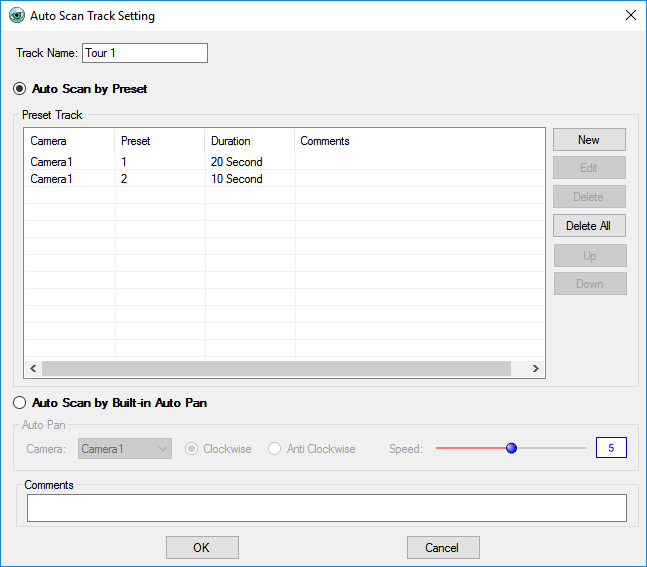
Click Edit Track button to show Auto Scan Track Setting panel.
There are 2 ways for auto scan.
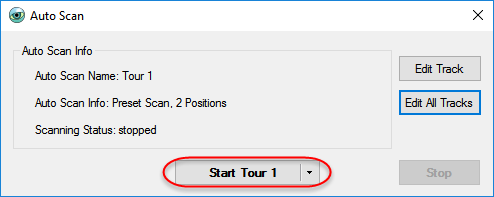
After adding or editing auto scan track, click Start button with selected track on Auto Scan panel.
PTZ Controller 3.7 supports two group of Custom Functions. Each group includes 6 buttons. The buttons can be set to different functions. Click menu Setting -> Custom Functions 1 Setting to show the panel below.
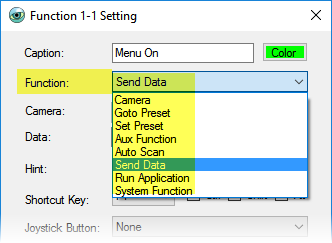
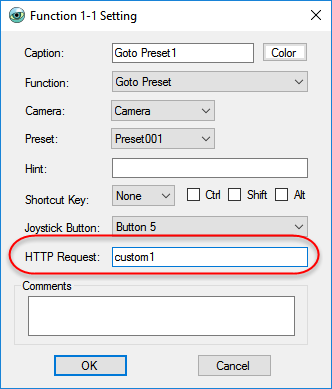
Click Edit button to show Function Setting panel. There are several function options.
Edit above panel to set the functions for custom buttons on Custom Functions 1 and Custom Functions 2 panels.
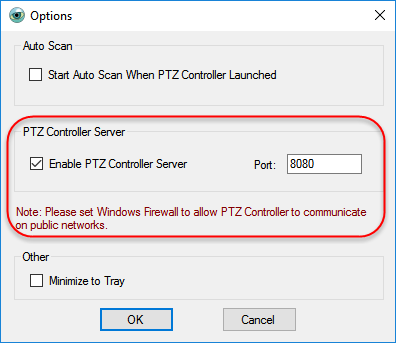
PTZ Controller 3.7 supports build-in HTTP CGI server. It allow to control PTZ cameras remotely through HTTP request. Click menu Setting –> Options to select “Enable PTZ Controller Server” and set Port Number or keep it default as 8080.
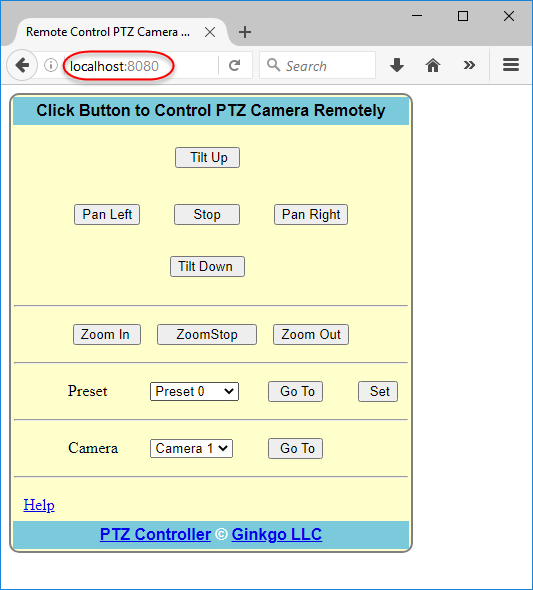
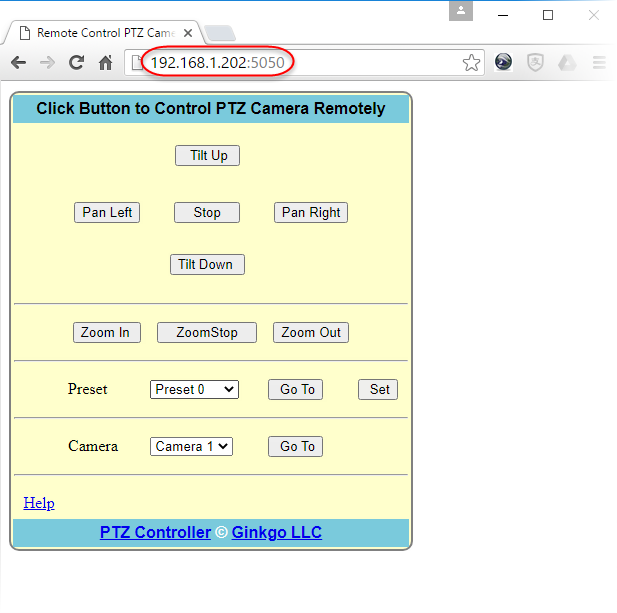
To test if PTZ Controller server is running, open the internet browser, and type the following line, replace the port number if the port is set other than 8080. A webpage should show as below. That means PTZ Controller server is running. Click the button on the webpage will send HTTP request to control PTZ Camera.
Make sure the port number is allow to access in Windows firewall setting. Please visit Microsoft website to get more information about firewall setup. tup. HTTP request format : http://IPaddress:port/command IPaddress : it’s the IP address of the computer that running PTZ Controller. Port: it’s the port number the server listen. Port number can be reset on Options panel shown above. You can control Pan, Tilt and Zoom without parameters, or with parameters. The value of Pan, Tilt and Zoom is -63 to 63. It can be used with pan tilt only or zoom only.
In PTZ Controller 3.7 , the command buttons are built in the webpage. Click the button to control Pan, Tilt and Zoom directly.
Each custom function can be set up a HTTP request command also. For example, according the Custom Function Setting, the HTTP request below will do "Set Preset 1". http://192.168.1.9:8080/custom1
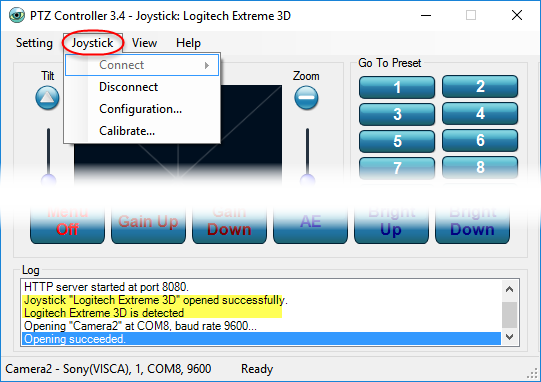
PTZ Controller 3.7 supports built-in joystick. Connect your USB joystick with computer. We recommend Logitech’s extreme 3D joystick or Logitech RumblePad. Once the joystick is connected with your computer, you will see the info in PTZ Controller Log panel. Click menu Joystick -> Connect to select the detected joystick or gamepad.
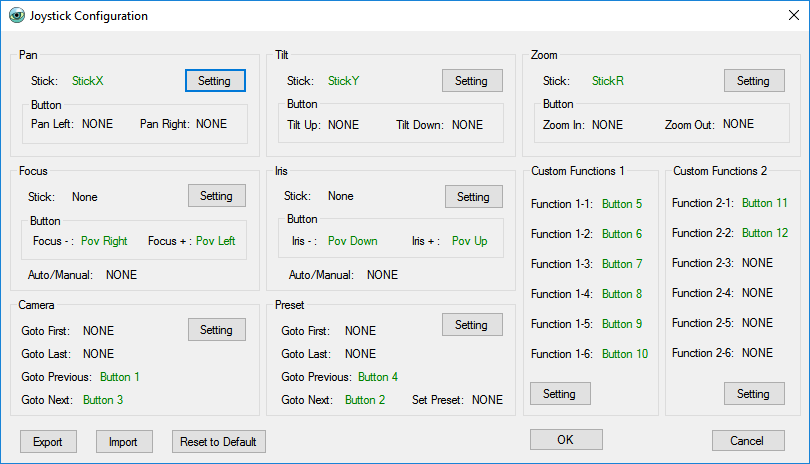
Click menu Joystick -> Configuration to show Joystick Configuration panel.
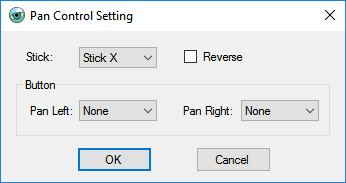
Click Setting button to select stick or button to map the function for Pan, Tilt, Zoom, Focus, Iris, Camera, Preset, and Custom Functions as you want. Here is the example for Pan control setting.
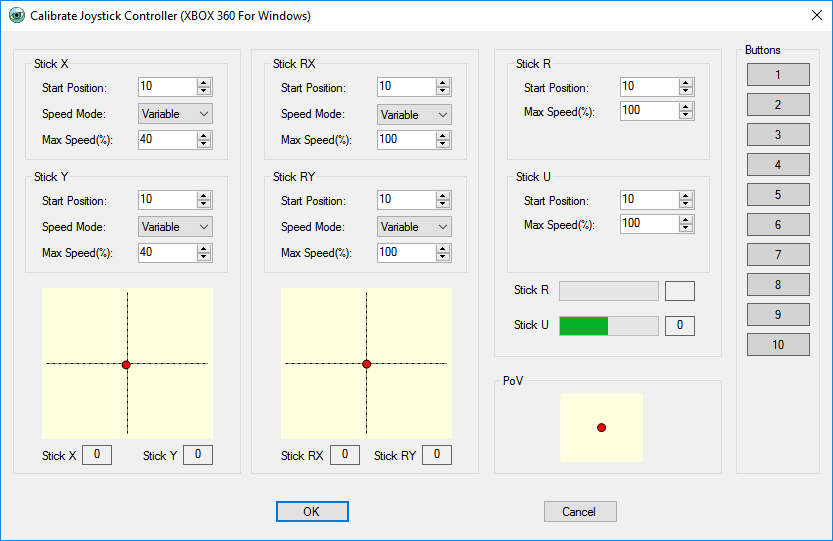
You can Export or Import your configuration, as well as Reset to Default setting. After you have joystick connected, click menu Joystick -> Calibrate to show the panel below. Move stick or press buttons on your joystick, you will see the action on this panel. You also can adjust the start position, max speed for the sticks here.
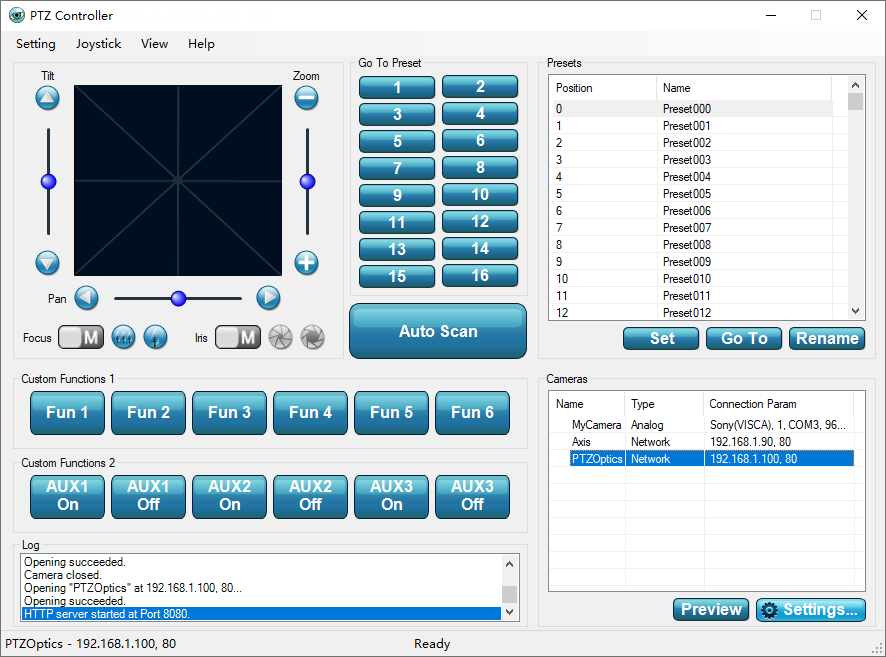
How to Switch Control Interface Click menu View-> Normal to show full control interface.
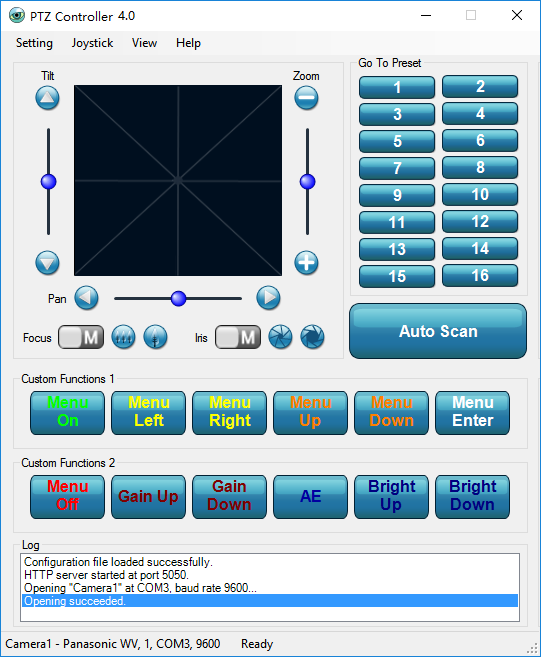
Click menu View -> Compact to get smaller Size.
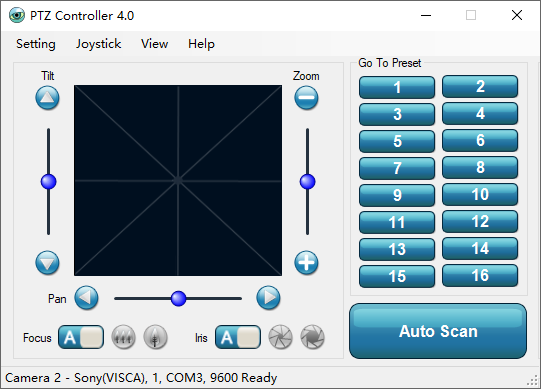
Click menu View -> Mini to get minimize Size.
How to Control with Keyboard Shortcuts PTZ Controller supports standard windows keyboard shortcuts.
|
|||||||||||||||||||||||||||||||||||||||||||||||||||||||||||
|
|
 button on
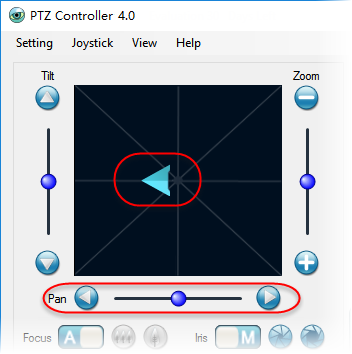
 or
or
 to
pan left or pan right step by step.
 to
move PTZ camera left or right continuously.
  .
Move the arrow to control.
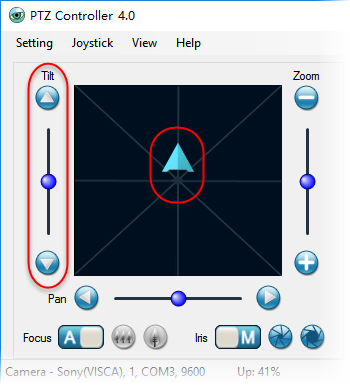
 or
or
 to
tilt up or tilt down step by step.
 .
Move the arrow to control.
 or
or
 to
pan left or pan right step by step.
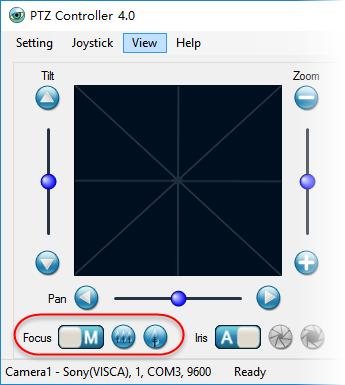
 to select control focus automatically or manually. The focus near
 and
focus far
 buttons
are available for manual control only.
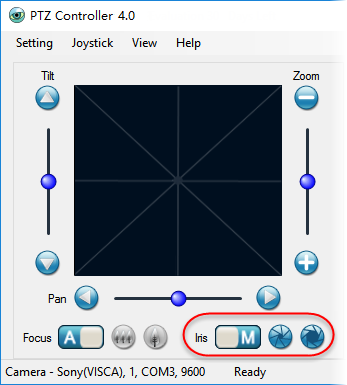
 to select control iris automatically or manually. The iris open
 and
iris close
 buttons
are available for manual control only.
 button to open Auto
Scan panel.